
Table of Contents
Introduction
The roof is one of the most important structures at home and it is also the most expensive one. Since it is also related to the stability of the overall structure, everyone focuses too much on the quality of the roof. The quality of the roof is measured based on the local settings because local weather plays a vital role in the selection of the roof type. An area where it snows a lot and moisture is always in the air demands a different type of roof as compared to a dry area. Regardless of the roof type, there are a few things that come with the roof, just like the drip edge.
The roof isn’t a simple structure, there are a lot of things installed beneath the top layer of the roof. The task of a roof is to protect everything beneath it from harsh weather. However, it must be equipped with the necessary tools to perform the designated task. Gutters, fascia, roofing material, soffit are all major components of the roof. Each and every single of them performs its assigned task, only then a roof is called an optimal solution. Roofing isn’t something that you can install yourself, because it requires precision workers. That not only knows various roof components but can know how to install drip edges as well.
Drip Edge Flashing
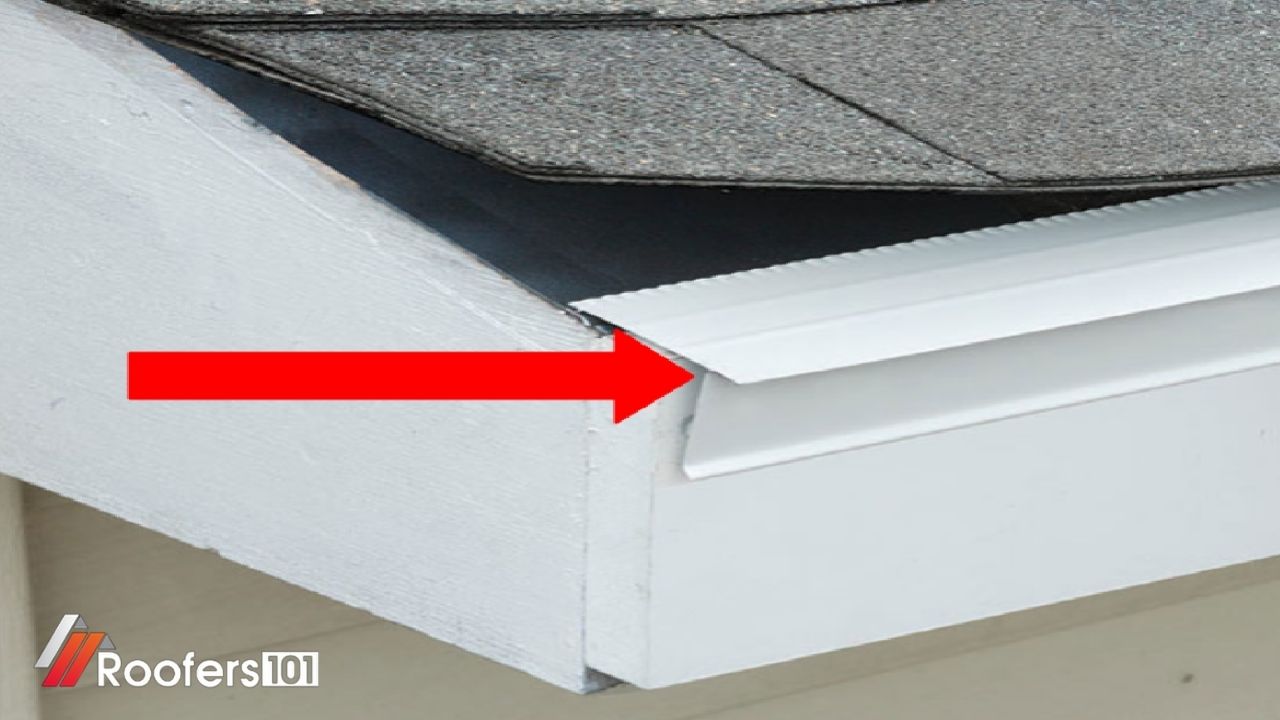
The roof is made of a lot of complex stuff that works together to protect you from harsh weather. The roof has to protect itself before it can protect you, and drip edge flashing is the heart and soul of that complex roof mechanism. It is made of non-corrosive metal and is installed at the edges of a roof to control the flow of water. It is installed under the roof structure and it rests on the roof sheathing and after it bends down and protects the fascia. The reason for its installation is to protect the roof from excess water.
The places that experience heavy rainfall are at a continuous risk because when water is mixed with air it can penetrate anything but not the roof that has a drip edge. The water flows down and right before it has to hit the wall the drip edge separates it from the roof and sends it downwards. Since the material is durable the drip edge can last as long as a roof can. The ideal way to install a drip edge is with the help of an expert because when you are investing on the roof, then why risk the safety over a few dollars.
General Drip Edge Installation Technique
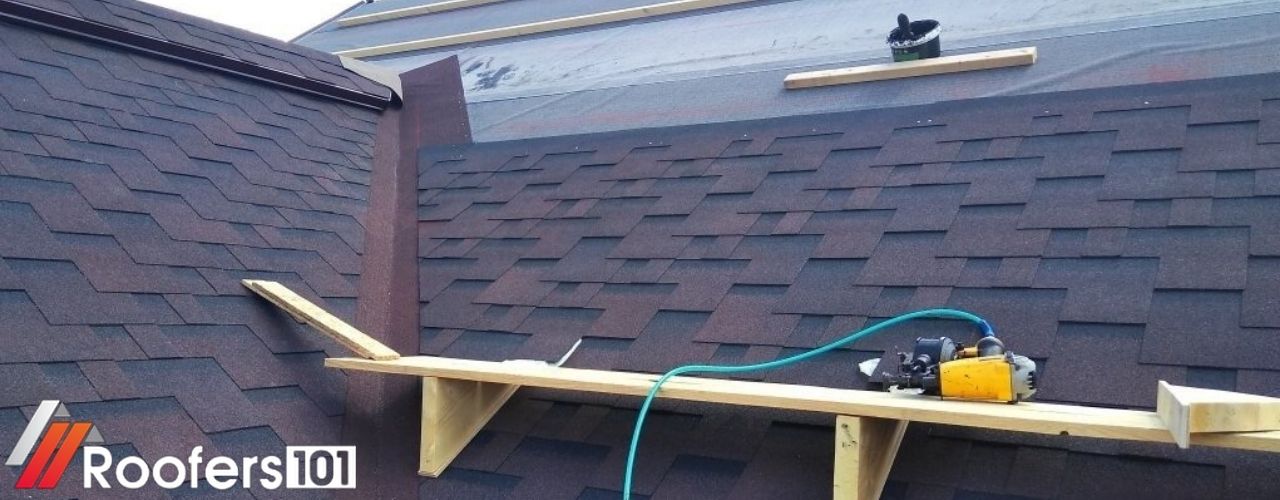
Now that you know the job of the drip edge and it is quite understandable why it is necessary to always hire an expert to do it. Before you start installing the drip edge it is important to bend the drip edge so it can be fixed alongside the fascia. In olden times the experts used to do the bending work with hands, but the process has become quite easy these days. Now you don’t need all that hard work because the bending machine can easily do the magic for you. All well-equipped roofing companies usually have this machine because it is one of their basic needs.

You just need to know the size of the roof and then start bending it on that size. The experts recommend leaving about two inches of aluminum for bending and the rest of the material stays under the roofing material. The process is actually quite simple and you’d need the following materials before you can start bending the drip edge.
- Tin snips
- Roofing nails
- aluminum flashing
- Hammer
Once you have gathered the materials it is time to get down on it. Start with the aluminum flashing and roll it out and spread it over the targeted edge and leave about 2 inches hanging down from the roof. When it is in position, it is time to take the tin snips and cut the aluminum to the desired size. For the next step, you would need the help of an assistant and ask him to hold the aluminum firmly. Apply pressure to keep it in one place, and leave only 5 inches on the roof’s surface. Nail the aluminum sheet every twelve inches and do it in the center and leave the edges for the roofing material. Once installed you can start covering the 5 inches with the roofing material and you are all set.
Significance of a Drip Edge for Metal Roof
If you know a few things about roofs, then you’d know that experts don’t actually prescribe a drip edge for a metal roof. The reason for that is if the metal roof is left hanging one-inch material outside, then it acts like a drip edge. It just doesn’t have a shape like a drip edge. However, there are some very unique benefits of installing it on a metal roof. For example, it acts as a shield to the fascia, better appearance, protects the exterior of the house, and seals the opening to the attic. These are some of the top benefits of installing a drip edge on the metal roof. The installation procedure is similar to the one explained above.
Benefits of Drip Edge for a Shed Roof
A shed roof is quite different from a regular roof and it is constructed over two lower and two high walls giving it an extra elevation. It is a classic model of roof that is still in use and it comes in handy if you require more room upstairs. In addition, snow can slide away faster than any other type of roof. Still, it requires a fascia and a drip edge because of the excessive slope the water hits it hard and the downward flow has a higher speed. The drip edge offers these benefits when installed on a shed roof. Extends the expected life of the roof, protection from potential threats, pest protection, uniform water dripping, shield against the wind.
The installation is quite similar to the general installation method with a few additions. You have to install the drip edge over the felt and then nail it every 12 inches. The rake drip edge overlaps the eave drip edge and you must bend the eave drip edge corners under the rake drip edge.
Replacing Fascia with Drip Edge
A roof is made of different components and every one has its functionality. When one component is greatly damaged, then it must be replaced without damaging the rest of the settings. The fascial is an important element of the roof that is installed under the drip edge that covers the soffit and interior of the roof. Its job is to prevent moisture from entering the interior of the roof. The fascia is usually available in different materials. It can be wood or aluminum, or you can also find it in vinyl as well. All of the choices are highly efficient because the risk of damage is quite less due to the drip edge. However, if the drip edge is not installed, then the fascia would require a replacement sooner than you think.
Regardless of the type of roof you have, replacing fascia isn’t that difficult and it certainly doesn’t damage the rest of the structure of the roof. The reason for that is it is independently connected to the roof. That’s why it can be removed and replaced with a new one. A fascia made of aluminum would rarely require a replacement because this particular material is specifically used for waterproofing. The riskiest material is wood because it can readily absorb moisture even if it doesn’t come in contact with water. When the fascia is rotten, it can be easily removed by using professional equipment. Doesn’t matter if you have a barrel tile roof or a flat roof the removal is very simple.
You just need to pay attention when you are installing the replacement because it would require teamwork. Usually, the experts are hired for the task because it demands both skills and experience. Otherwise, you might end up damaging the roof. Make sure the area is liberated and prepared for work. Remember to follow the guidelines and instructions by the professionals for personal safety. Before starting the replacement work it would be wise to check if the company has a license and valid insurance.
Every part of the roof has a specific function because it is designed to keep you and your investment safe. Likewise, the gap between the drip edge and fascia isn’t left for nothing. It is designed this way so the two components don’t come in contact to protect the roof. The gap acts as the insulation and when water runs down the drip edge it doesn’t come in contact with fascia. The details above show perfectly how much synchronization is important for a roof to become a shield. That’s why it is your job to protect the roof and its supporting mechanism. When something is broken, fix it right away, this is the only way to ensure a longer lifespan of a roof.